Sunday, November 27, 2016

Upper Cabinet Doors

Now that the trailer was towable and theoretically watertight and usable, it's time to revisit all the little details that got left behind.

When we bought the trailer, it had gross sliding doors on the upper cabinets.  To make matters worse, the PO had put yucky contact paper over the gold glitter patterned formica.  It didn't really matter since we ditched the glitter countertops, but it's just not something we would have done.


To replicate the construction of the other original doors, we ripped down 1x2 into 1/2x2.  We then cut a 3/8x1/4" rabbet into the edge using our cheap table saw (note to anyone, please never buy Ryobi anything...).  This will allow the door to overlap the cabinet front and recess into the opening.


We then cut the front panels from leftover 1/8" birch paneling and glued the frame on.  I knew we kept that weight set around for something.

The completed subassembly.  We used the table saw and a chisel to rabbet the remaining end boards.  A router table is definitely on the want list (just not Ryobi).  After this photo, we cut more panels to glue to the interior as was done originally.  this is not necessary but adds a little strength and gives a finished appearance.

Back to shellac.


Here you can see a bit of the rear panel with the door installed.  We used 3/8" offset hinges which is why the original rabbet was 3/8"x1/4".  When you account for the 1/8" interior panel, the hinges fit perfectly.  We also used double roller catches on the lower portion of the door to keep them closed and we reused the original slider knobs, painted with black hammered Rustoleum.

The doors installed.  Even Maggie is happy to see those old sliders gone and the holes covered up.


Tuesday, November 22, 2016

Our first outing

One small benefit of living in Taxifornia is the Permanent Trailer Identification.  Basically $10 registration for 5 years.  To get verified you must be less than 16 feet with no bathroom.

Our DMV appointment got us to the first window right away.  This was followed by standing in the verification parking spot with a clipboard like idiots (as instructed),

2 trips to measure (with our tape measure because they didn't have one), 2 counters, 2 people and a half an hour clicking around the computer system, a call to tech support, multiple forms, declarations, appeals and $40 (credit cards not accepted), we got the PTI sticker.
When the computer said they no longer issue stickers, I jokingly asked if she had some in the back of her drawer.  After 2 hours of paperwork, she opens the drawer and finds a sticker, lol.

Saturday, November 19, 2016

Towing safely

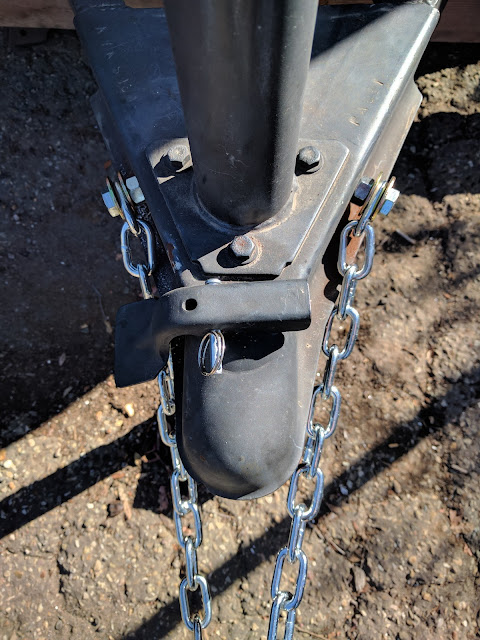
Our old safety chain was a joke, a broken link welded under the coupler.


A few good tugs and the link sheared right off.


We replaced it with a pair of 5/16", 5000lb rated safety chains.  They are bolted through the coupler and frame rails using Grade 8, M12 sized hardware.


Monday, November 14, 2016

Bearings and new tires

We should have done the bearings and tires when we had the body off the frame.  At the time, we always had it in the back of our mind that the thing might end up at the dump, so why waste the money on new tires.

Now, towards the end of the project, with our registration date approaching at the end of the month, we finally needed to stop procrastinating.  First task, get the wheels off.  For this, we put the frame on 4 jack stands and took the wheels to Costco.


We had ordered the tires online earlier in the week.  They are Greenball radial tires vs the old bias ply tires originally installed on the trailer.  Compared to the 32" tires on the truck, these little 24" tires on 13" rims are tiny.

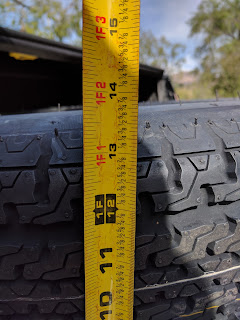
We were a little worried about the new tires fitting.  Many online sources said radials could be wider than bias ply.  Turns out, even after mounting, the new tires are actually narrower.  The radials should also get better mileage and run cooler.


With the tires back at home in under 2 hours (including a few other errands), it was time to address the hubs and bearings.  There are many tutorials online about greasing trailer bearings, so this won't be another one.  Suffice it to say, the potentially scary process was pretty easy.

Getting both hubs disassembled and cleaned was a pretty quick process.  We finally found a use for our dopey corporate magazine.
Getting the rear bearings out requires a special tool.  I didn't have the right diameter pipe to push them out and didn't want to use anything damaging, so I "borrowed" some 1-1/4" pipe from a neighbor and sanded it down to the right outside diameter to push the bearing and seal out.


All nice and clean and ready for new grease.


The reassembled hub


The cotter pins originally used were very small 1" size, so the wife ran out and got some longer pins to make sure the castle nut was secure.


The wheels back on and ready to roll.


We sorta changed our mind on the color to paint the rims, so will hold off until we paint the whole thing.


With the rest of our weekend, we started reinstalling the trim that covers up each panel seam.  It's quite a bit darker than the new birch, even with only clear shellac, but it's a look that's growing on us.  We have to add some more shellac to a few panels anyways, so they will darken up a bit more.