Sunday, January 31, 2016

Uh Oh, Part 6

Trailer:0  El Nino:1

We had a pretty nice little rainshower today, followed by mudslides, 60MPH winds and general chaos.  It turns out, Chinese made Costco carports and violent winds do not get along, so we will likely be putting the trailer project on hold until Spring.

After the winds shredded the front carport panel, tossed the frame around like a toy and nearly ended up the neighbor's yard, we took it all down and tarped up the tiled floor.
And our garage is back to unusable chaos.  We might still be able to work on the cabinets, but it's highly unlikely that we would be able to put up the large, sail-like walls with the potential for winds like this.

We often worry about earthquakes, living in an unreinforced cinder block house in California...but on days like this, we are thankful the big bad wolf can't get to us.

Sunday, January 24, 2016

Lower kitchen complete

Spent a lot of time fussing over which salvaged plywood to use for each rebuilt cabinet.  By the time I figured out what to do, I only had time to finish one cabinet, the new stove/icebox cabinet.


The cabinets all propped together.


Next, we need to fix both upper cabinets and the curb side bunk cabinet, then we'll be ready to refinish everything.

Sunday, January 17, 2016

The Ice Box...also cleaning out the garage

The carport was holding up pretty well from the wind and rain, so we emptied out the garage and started placing furniture.  The far bench was originally just a fragile frame so we beefed it up and attached the back to make it free standing for now.


Our trailer originally came with a front kitchen, including the icebox on the counter.  This bumped out area and hard to reach door always bugged us and the cabinet on the right was actually empty (we think it was a gravity fed water tank option as there is a hole in the wall for a fill inlet).

In a vintage trailer, an icebox has an upper tray for a block of ice, which chills the whole insulated box, and keeps the contents cool.  The melted water drains through a hose, through the floor onto the ground.  We're not sure we'll use it for more than storage, but it's a cool aqua color and it would be a shame to get rid of it.


On the Field and Stream Facebook site, we found this example where the icebox was removed and the counters were opened up to let more light in, which is what we planned to do.


We finally decided to place the icebox below the stove.  It doesn't open the right direction, but it was the best place.  Since the cabinet had some water damage from the leaking vent, this meant we also got to take a stab at building a new cabinet from scratch.

As a final note, here's the original fridge magnet from our icebox.  Glamping isn't a new concept... 


Saturday, January 2, 2016

Starting on the furniture

In an old travel trailer like this, the cabinets provide much of the strength of the entire trailers.  There is no way a flimsy stapled 3/4" thick wall could possibly stay together without all of the cabinets, closets, beds and seats anchoring the walls to the floor and ceiling.  Since we are building this outside, with a forecast El Nino rain season and uncharacteristic high winds, we thought that we needed this structure in place before putting our walls back up.

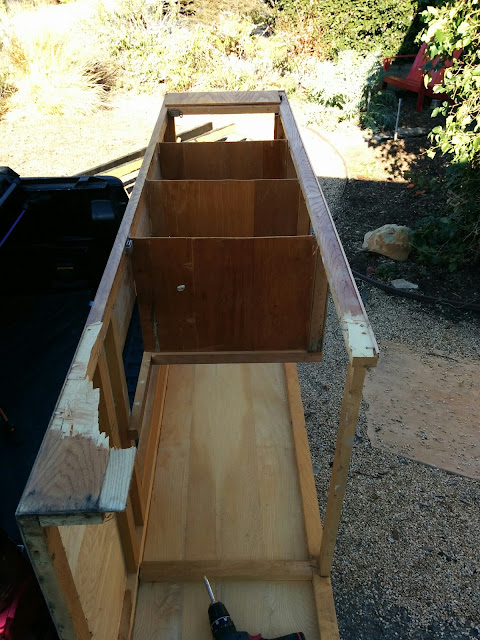
The most important cabinet of all, is the large floor to ceiling closet.  Nearly every vintage trailer has one, and nearly every "previous owner" mucks with them.  In our case, they roughly cut a hole in the rear side of the cabinet and added 3 flimsy shelves that protruded halfway into the main door opening (on the left in the photo below)


 These shelves were made out of the same 70s grooved panels that your Grandma has in her living room.  On those shelves were some funky bins made of the same material.  Mama was having none of that.


The first order of business was to find some replacement plywood to skin the ugly cutout.  As ash is no longer available in most places due to the ash borer beetle, we scrounged up enough from an old ceiling panel we had removed.


After some frustrating time with a chisel, trying to remove the old panel, we finally just rebuilt the whole side of the closet, adding cleats to hold new, clean shelves.

The one portion of the old wood we couldn't replace was where the front meets the edge.  The front panel is rounded over, so we wanted to preserve this edge.  To do this, we used a straight cutting bit on a router and trimmed out the old material (and the staples secretly holding it in place, oops).  The new panel was a little warped from being outside and original water damage, but some glue and brads got it flat enough for us.


As an interesting aside, the ash plywood paneling used in this trailer was all made in Japan.  Many vintage trailer enthusiasts complain about the poor quality Chinese made wood available now, including us, having to scrap over $100 in plywood that just fell apart in our hands.  The fact is, these trailers were always built with the lowest quality materials of their time, which just happened to come from Japan in the 60s.